This quick start helps you prepare Sobes Copilot for your first meeting: set up the response context, open the overlay, choose an audio recording mode, and learn the main actions in the app. After that, Copilot can follow the conversation, use your experience, and quickly answer questions from voice or screen context.
1. Create a Context
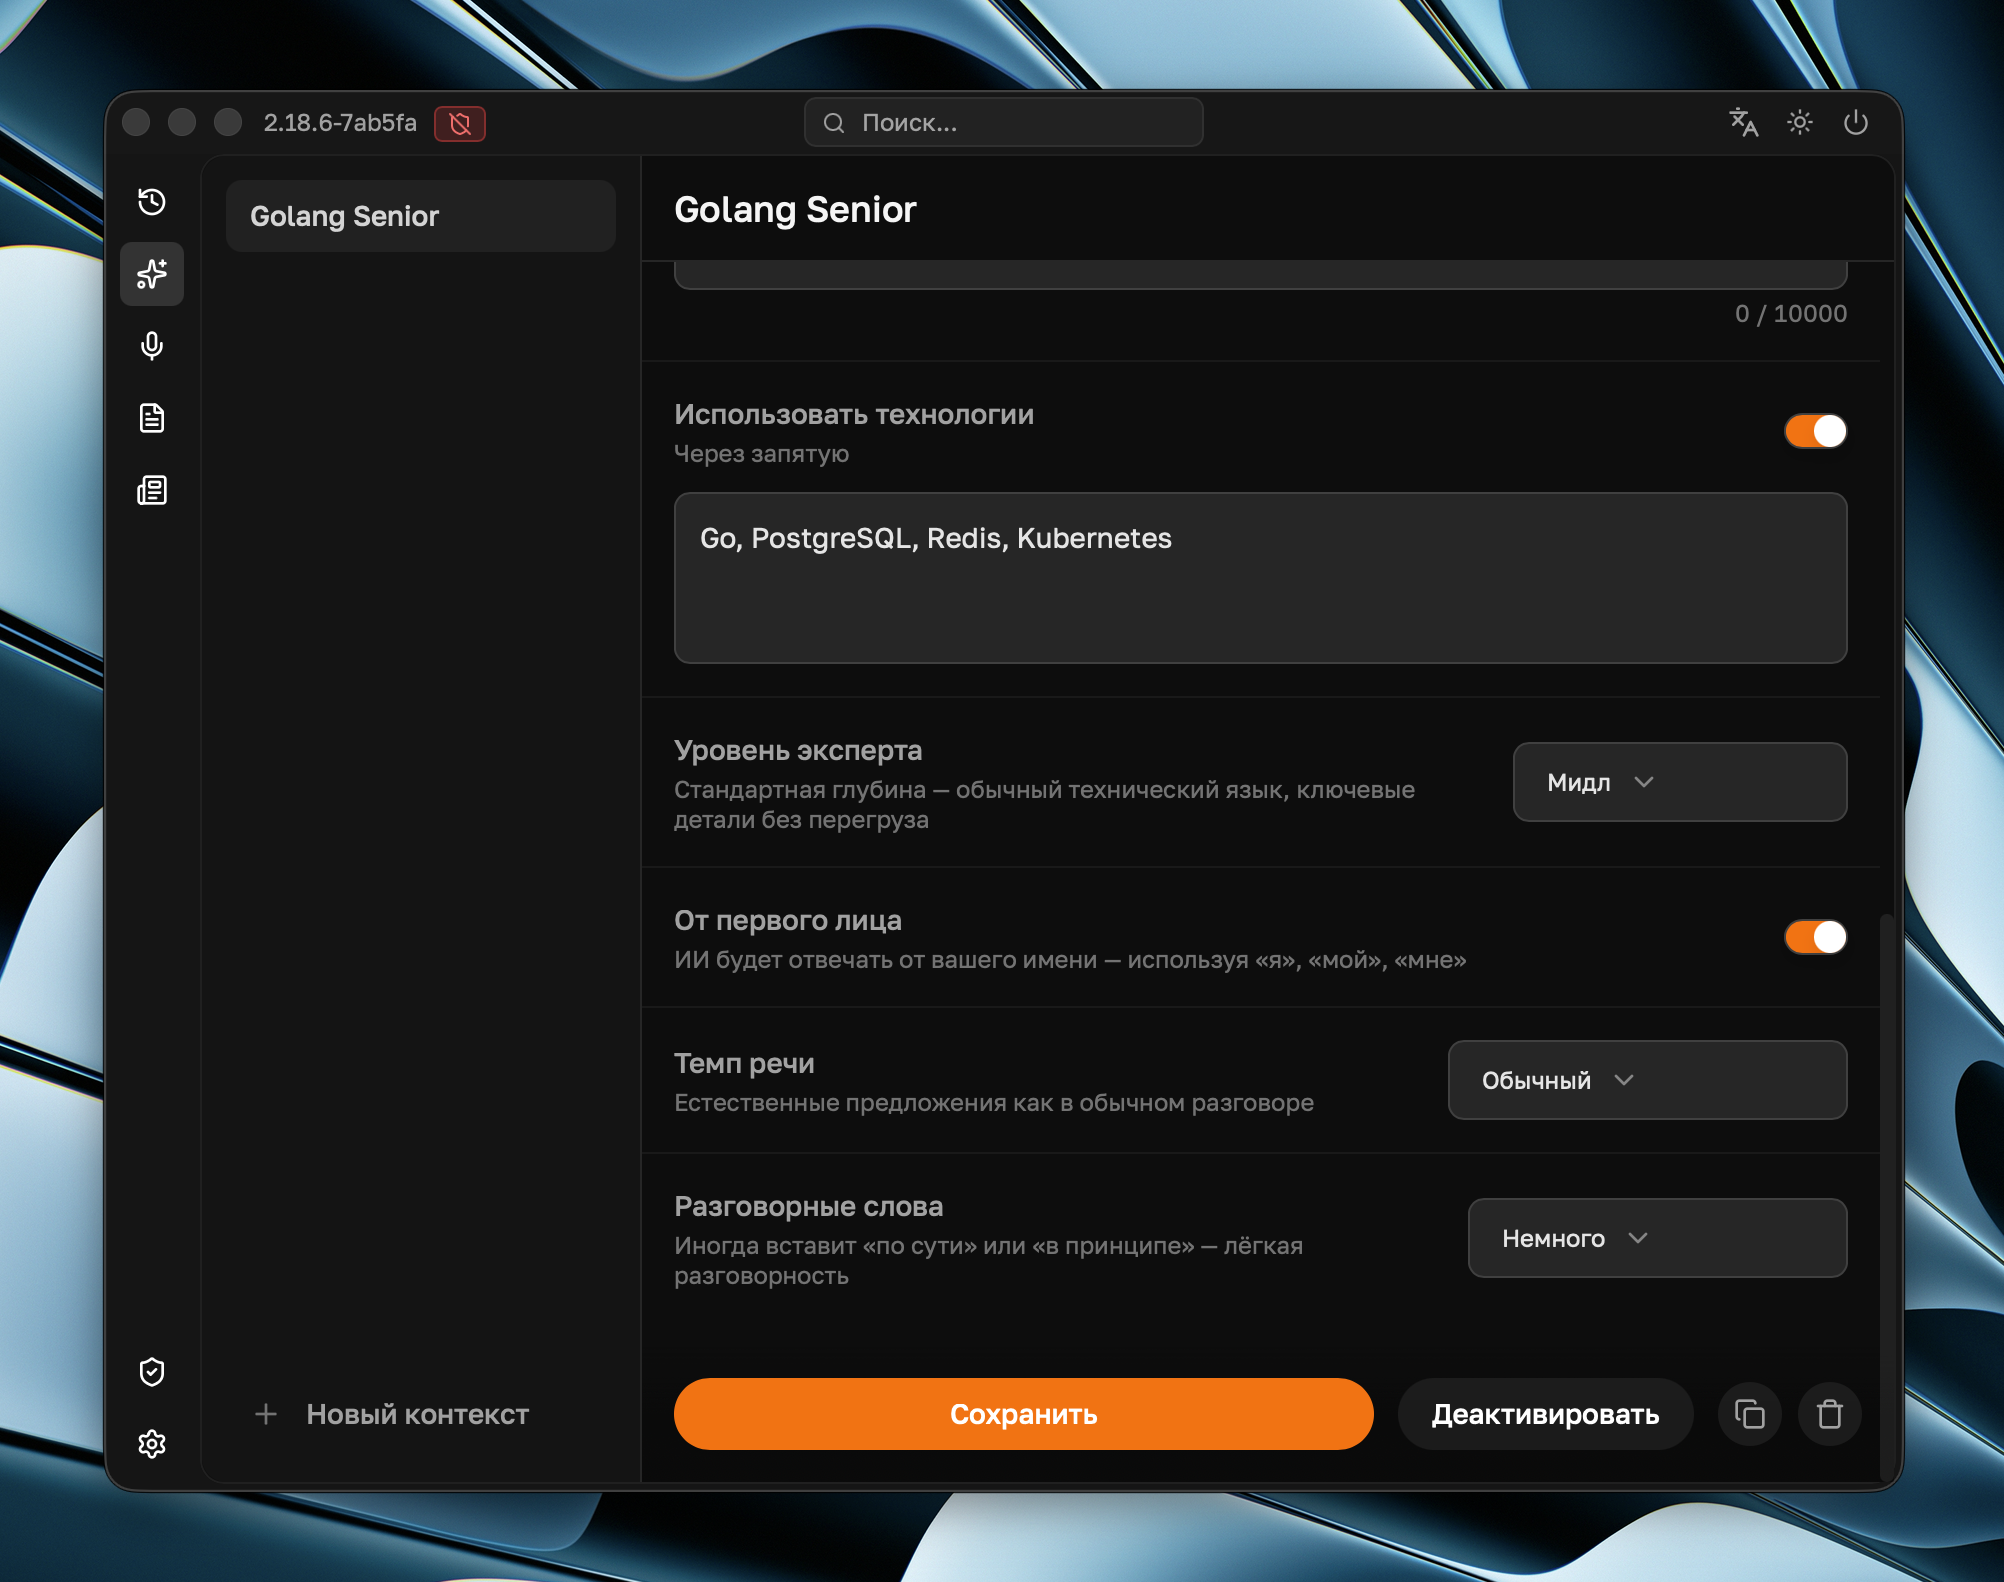
A context is the assistant's behavior profile. It stores your role, response language, resume, technologies, response format, and answer length. Without a context, the assistant answers in a generic way; with a context, it adapts to your role and interview type.
Minimum setup before an interview:
- Open Contexts.
- Create a new context for the meeting: for example,
Frontend React,Python Backend,HR Interview. - Fill in every field in the context editor: the more accurately you describe your role, experience, technologies, and response preferences, the more useful the hints will be.
- Click Activate in the context editor — after that, Copilot will use this context for new answers.
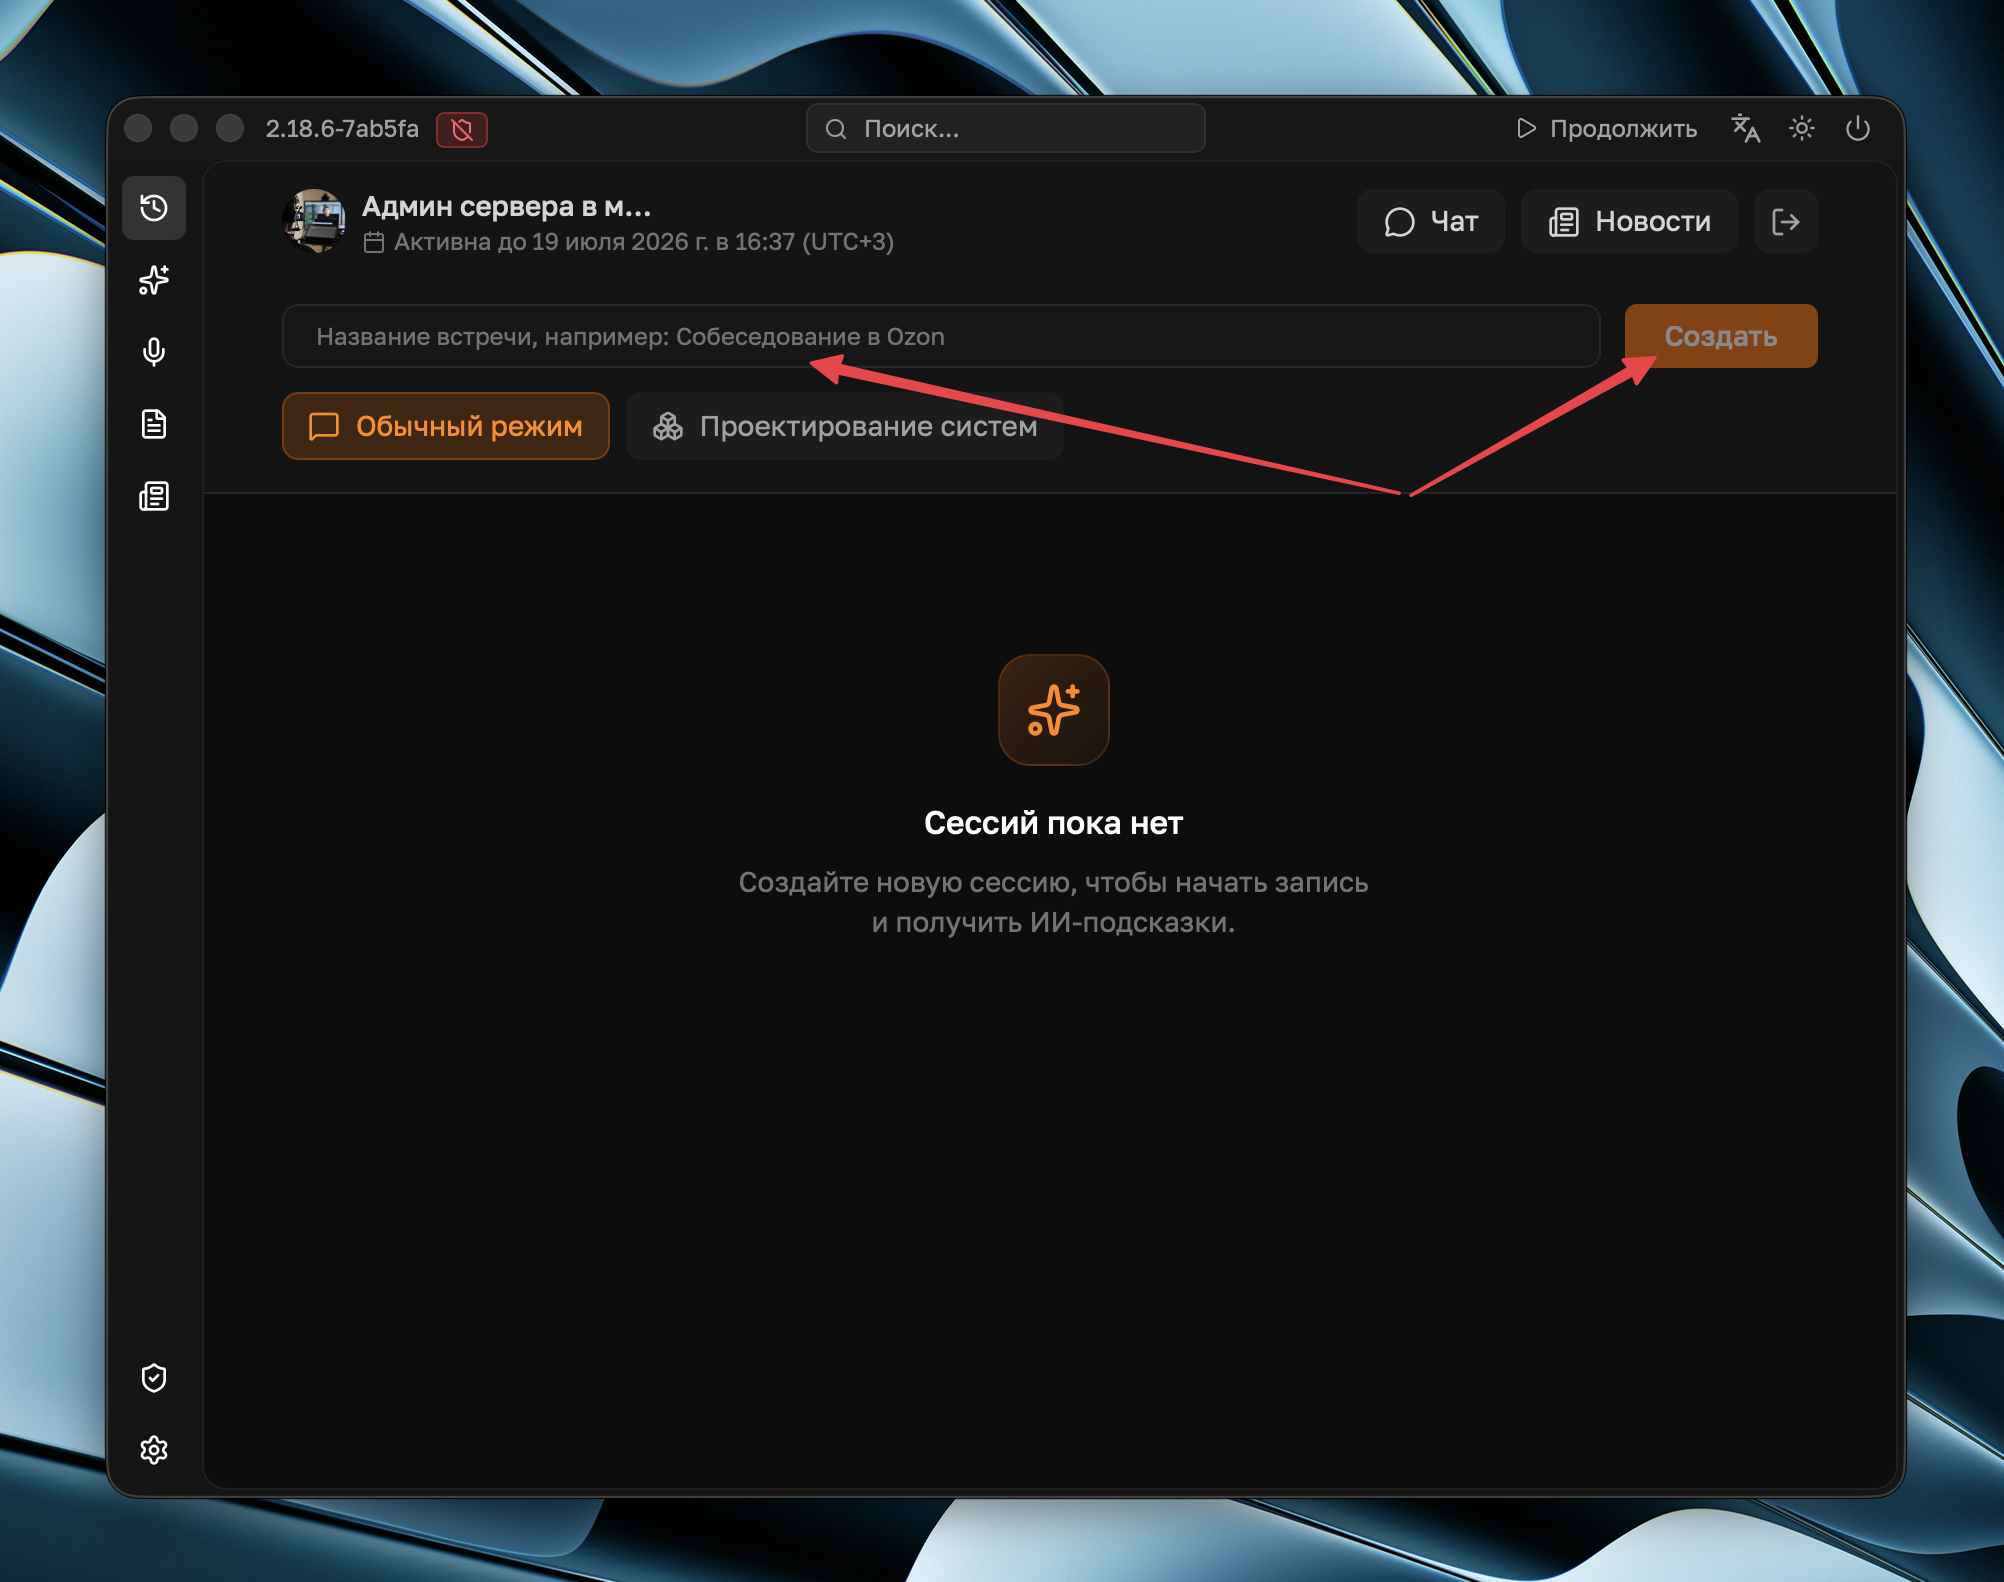
2. Start a Meeting and Open the Overlay
Create a new meeting and choose a mode. Regular interview is for HR interviews, technical questions, live coding, and any meeting where you need Copilot chat, audio recording, screenshots, and quick actions. System Design opens the mode for architecture interviews: with a board, diagrams, and visual system design work.
After creating the meeting, the Copilot overlay will open. This is the working panel on top of your interview: here you control audio recording, send requests, take screenshots, and trigger quick actions.
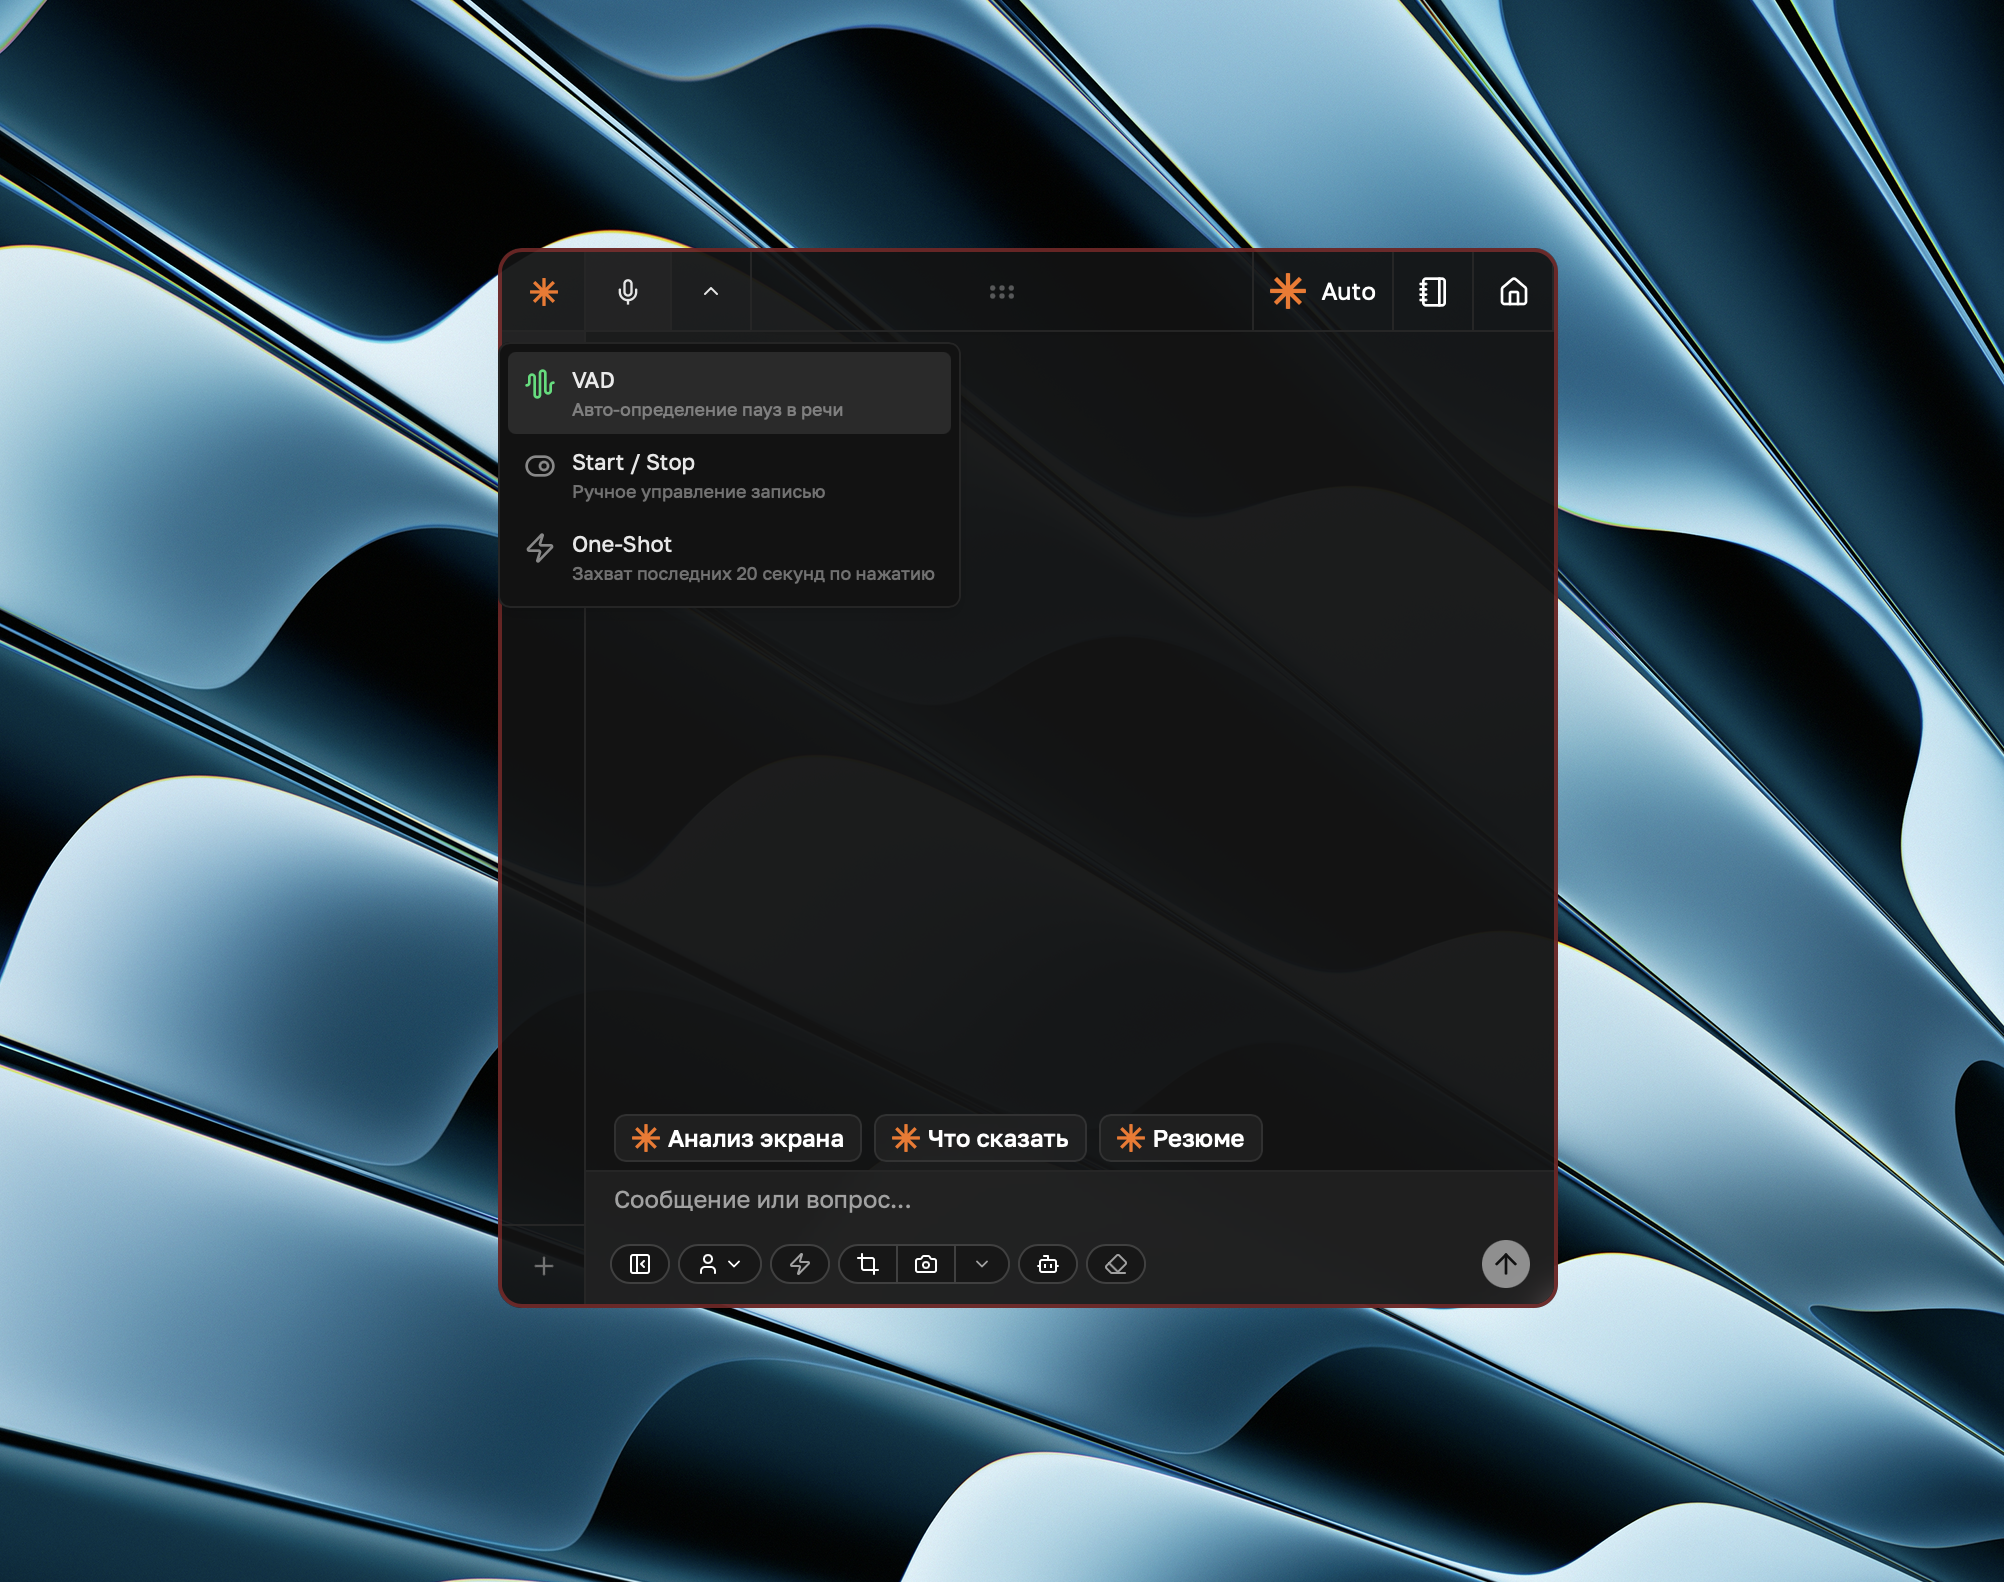
3. Choose an Audio Recording Mode
Audio is transcribed and added to the meeting context. This helps Copilot understand what the interviewer has already said, what you answered, and provide a hint without you manually retelling the question.
You can choose the recording mode from the microphone button dropdown in the meeting panel. Start and stop recording with the microphone button or the Ctrl/Cmd + R shortcut.
VAD is the main mode for interviews and calls. Copilot detects speech, starts recording, and ends the segment after a pause. It is convenient to enable once at the beginning of the meeting: after that, you speak normally and the app sends segments for transcription automatically.
Start / Stop is manual mode. Recording happens only between two clicks of the microphone button or Ctrl/Cmd + R. Use it when you need full control: for example, to record only interviewer questions, specific parts of a call, or moments where you definitely want a hint.
One-Shot captures a recent fragment quickly. If the question has already been asked and recording was not enabled beforehand, press the button or Ctrl/Cmd + R: Copilot will take the last seconds from the audio buffer and send them for transcription.
For the first run, choose VAD. It is the calmest mode for interviews: the app splits the conversation into segments, sends them for transcription, and gradually fills the context. If VAD captures too much noise or you want to control every recording manually, switch to Start / Stop.
Learn more about modes, buffer, One-Shot, and transcription parameters in Audio Recording.
4. Learn the Main Shortcuts
The full list is in the Keyboard Shortcuts article, but these are enough to start:
| Action | Windows | macOS |
|---|---|---|
| Hide or show the window | Ctrl + B | Cmd + B |
| Move the window | Ctrl + ←/↑/↓/→ | Cmd + ←/↑/↓/→ |
| Resize the window | Ctrl + Shift + ←/↑/↓/→ | Cmd + Shift + ←/↑/↓/→ |
| Start or stop recording | Ctrl + R | Cmd + R |
| Full-screen screenshot | Ctrl + H | Cmd + H |
| Area screenshot | Ctrl + Shift + H | Cmd + Shift + H |
| Send request with screenshot | Ctrl + Enter | Cmd + Enter |
| Send request without screenshot | Ctrl + Shift + Enter | Cmd + Shift + Enter |
| Cancel generation | Ctrl + G | Cmd + G |
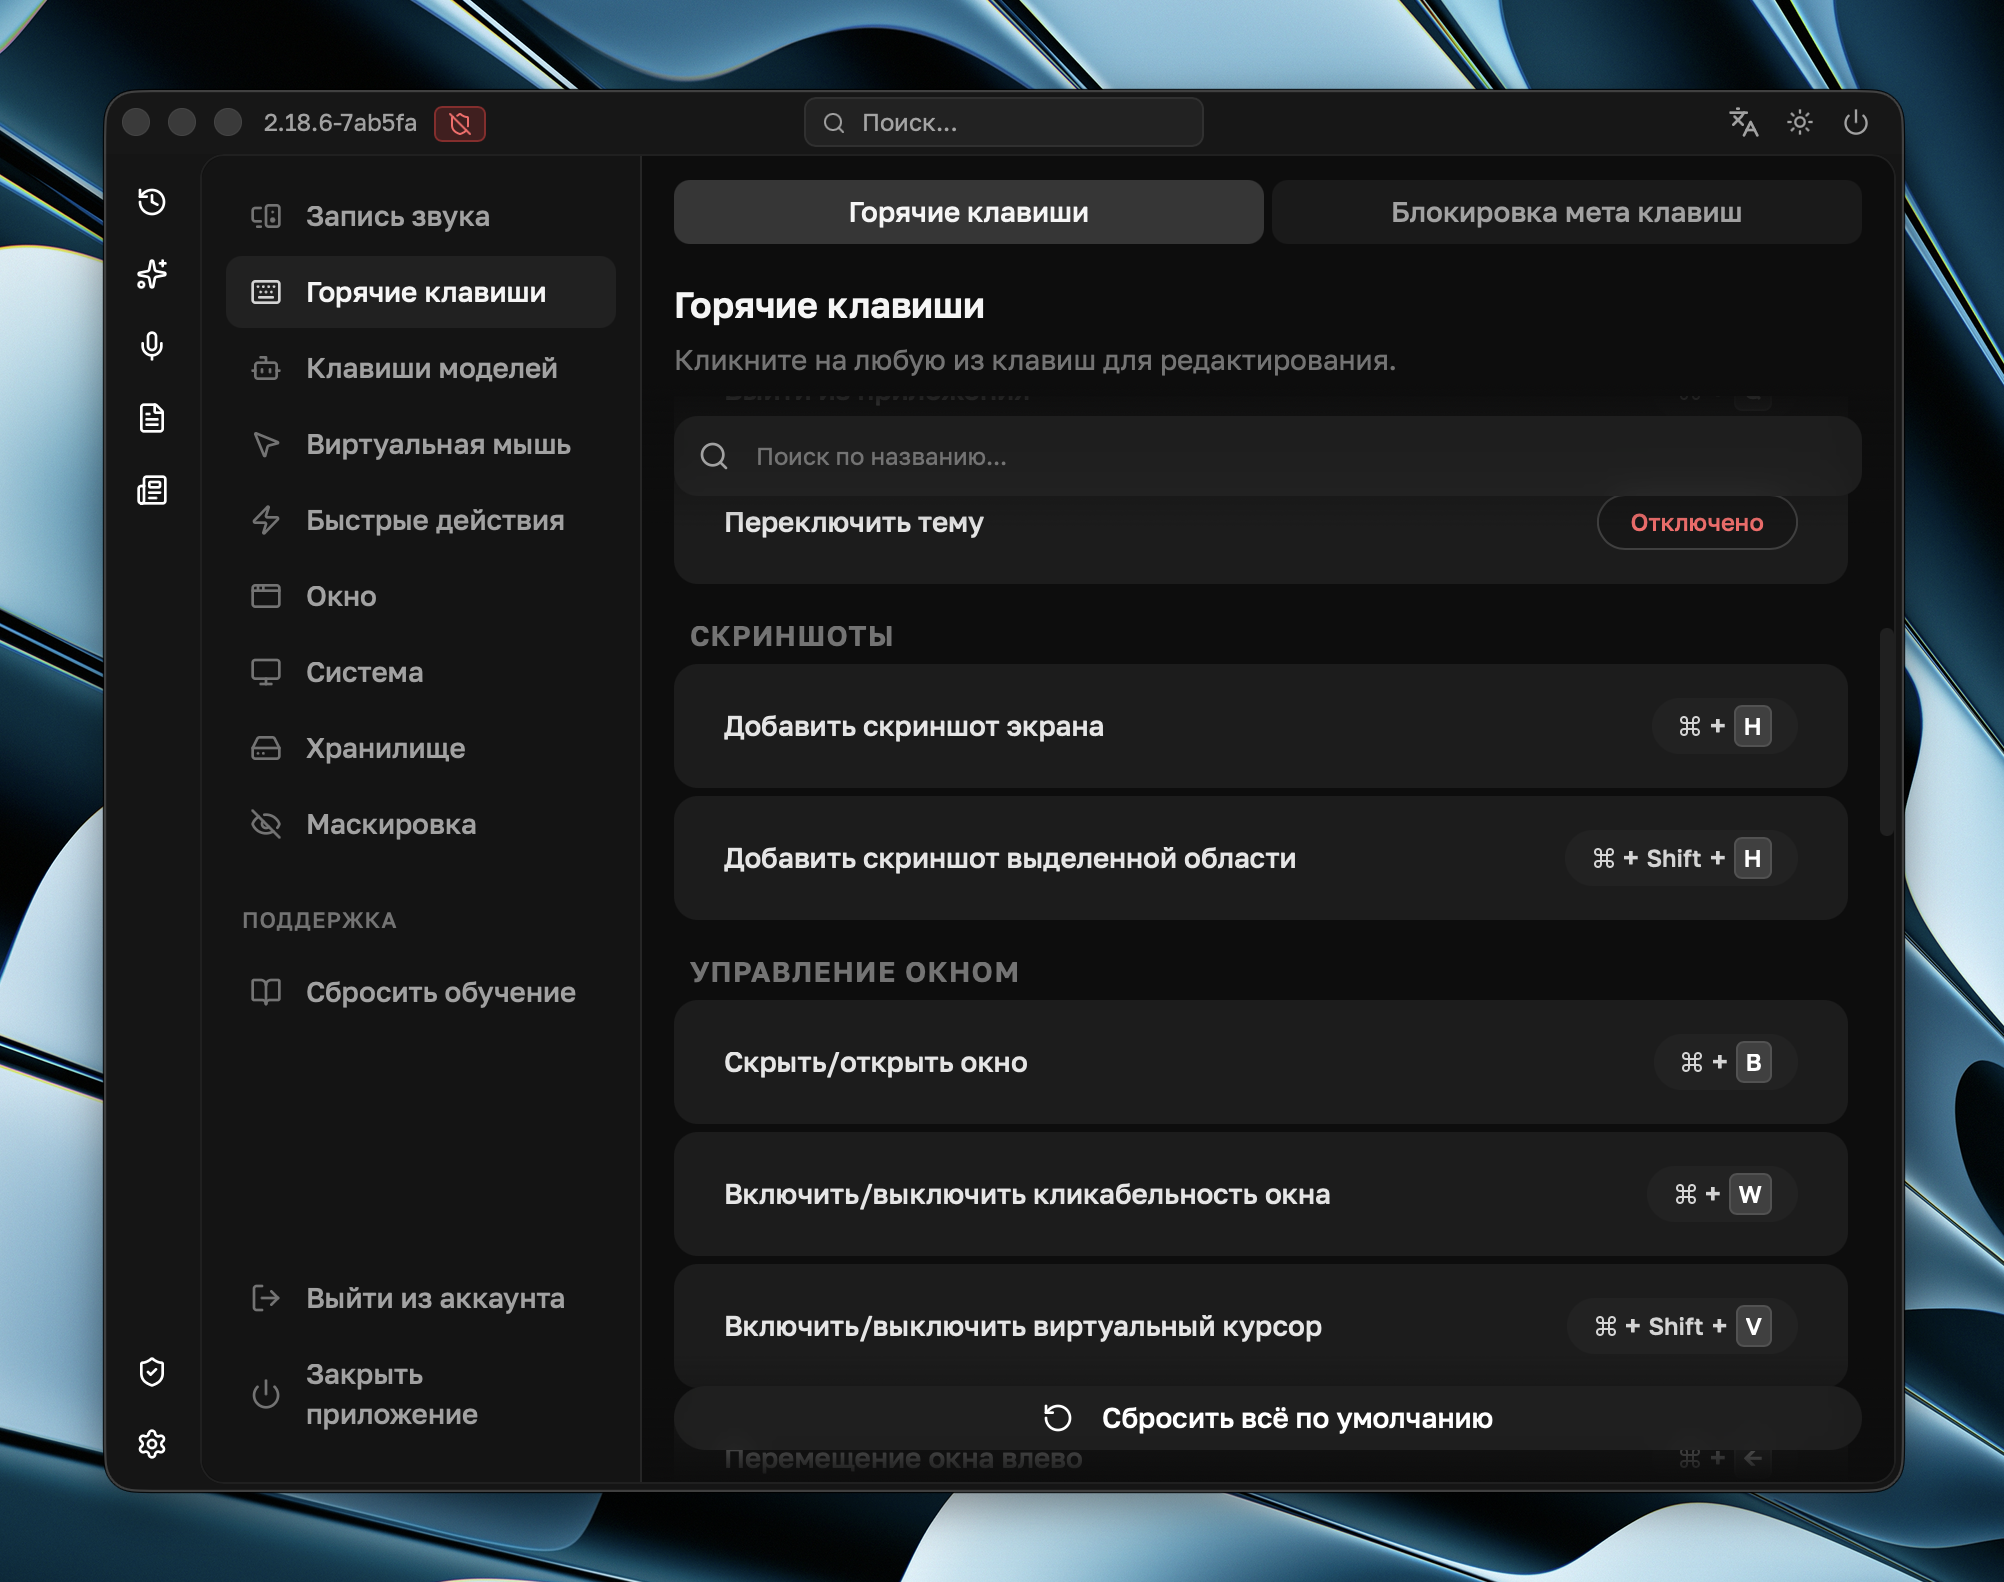
During interviews, you will most often hide the window, move or shrink the panel, start recording, and send a screenshot with a question. You can learn the rest later in the full Keyboard Shortcuts list.
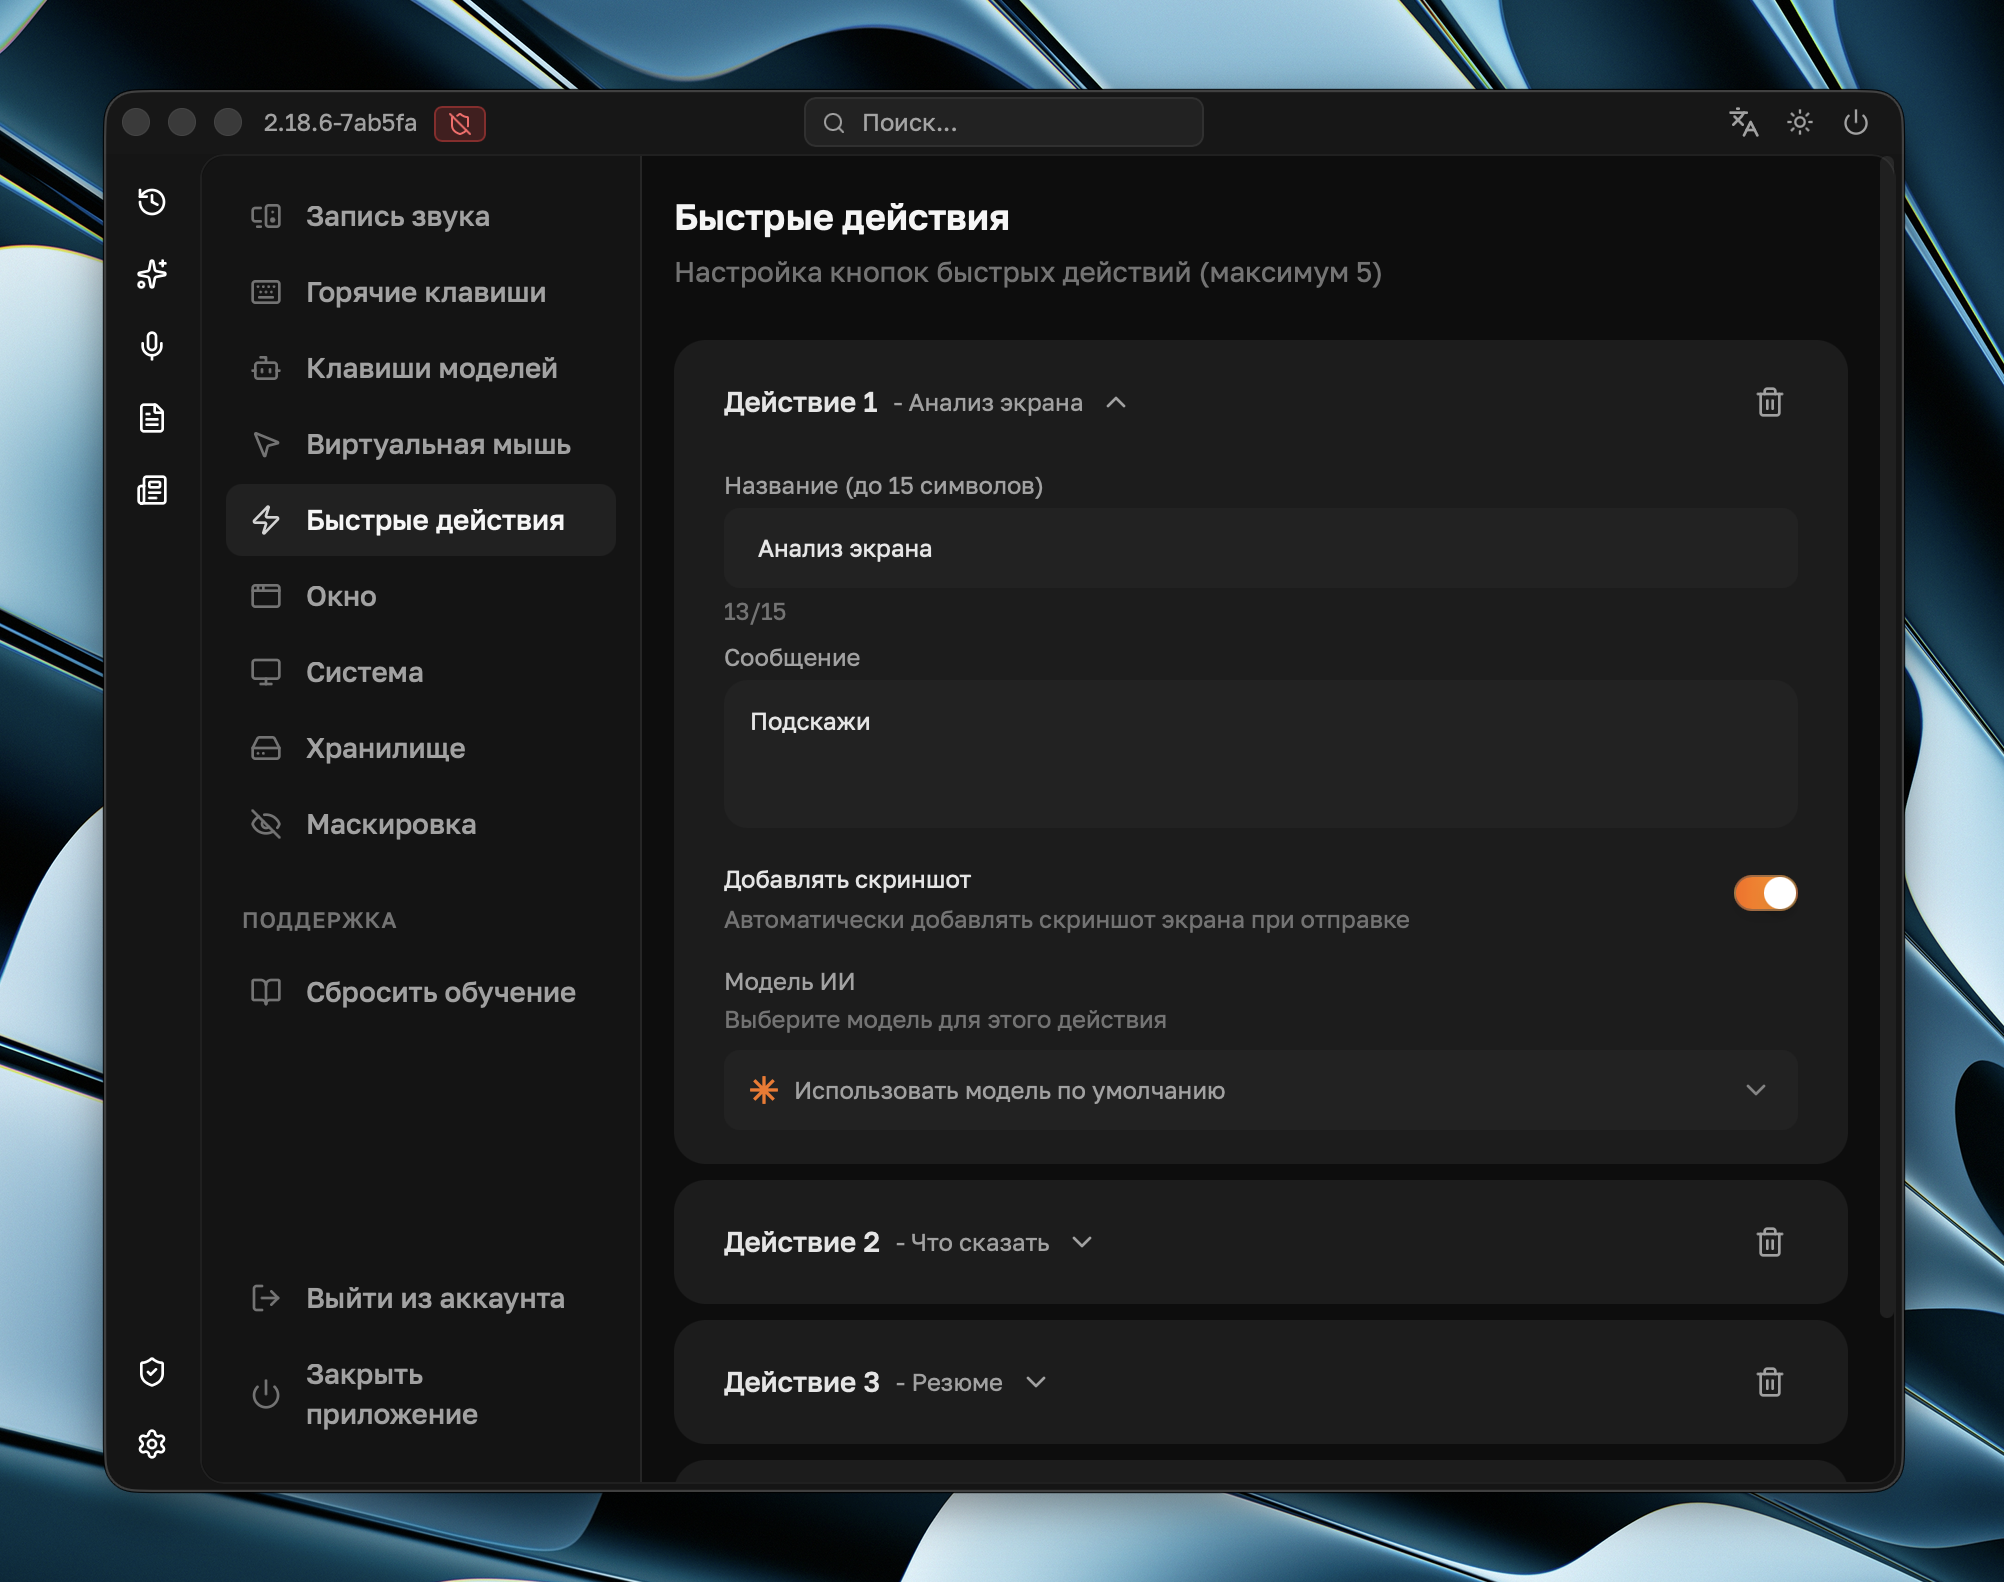
5. Use Quick Actions
Quick actions are buttons above the input field. They send a preconfigured request to the assistant, sometimes with a screenshot. By default, there are three useful scenarios:
| Action | What it does | Shortcut |
|---|---|---|
| Screen Analysis | Takes a screenshot and asks for help with what is visible on screen. | Ctrl/Cmd + 1 |
| What to Say | Looks at the conversation context and suggests an answer. | Ctrl/Cmd + 2 |
| Summary | Briefly summarizes recent messages and transcripts. | Ctrl/Cmd + 3 |
In settings, you can create up to 5 quick actions, change the prompt text, enable or disable screenshot capture, and choose a separate model for each action.